

Venetian Plaster Application Guide: Lime Plaster, Marmorino Plaster and Acrylic Finishes
Venetian plaster is a trowel-applied decorative wall finish used to create seamless surfaces with natural depth, movement and a smooth stone-like appearance. Depending on the material and application technique, the finished surface can range from soft and matte to highly polished and marble-like.
Traditional lime-based Venetian plaster is made from limestone, marble dust and mineral ingredients. As the plaster cures, the lime carbonates and turns back into stone, creating a breathable and exceptionally durable finish.
Modern acrylic Venetian plaster provides greater flexibility for blending multiple colors, creating veining and producing dramatic marbleized effects.
This guide explains how to apply Venetian plaster using Meoded Paint & Plaster products, including polished Venetian plaster, matte Marmorino, stone-effect lime plaster and acrylic Venetian plaster.
Before beginning, decide what type of finish you want to create. Meoded offers several options.
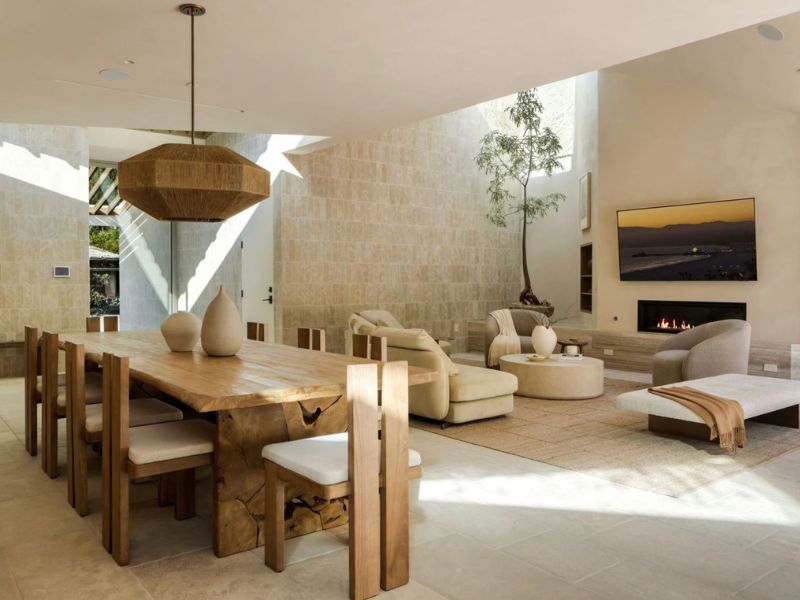
Stucco Lamundo is a fine lime-based, traditional high-gloss Venetian plaster designed for smooth, highly polished, marble-like interior surfaces. It is applied in three thin coats and burnished during the final coat to create depth, color variation and sheen.
Choose Stucco Lamundo for polished walls, ceilings, columns and architectural details. When Lamundo is lightly burnished, and sealed with HydroWax, it creates a finish that is both modern and luxurious.
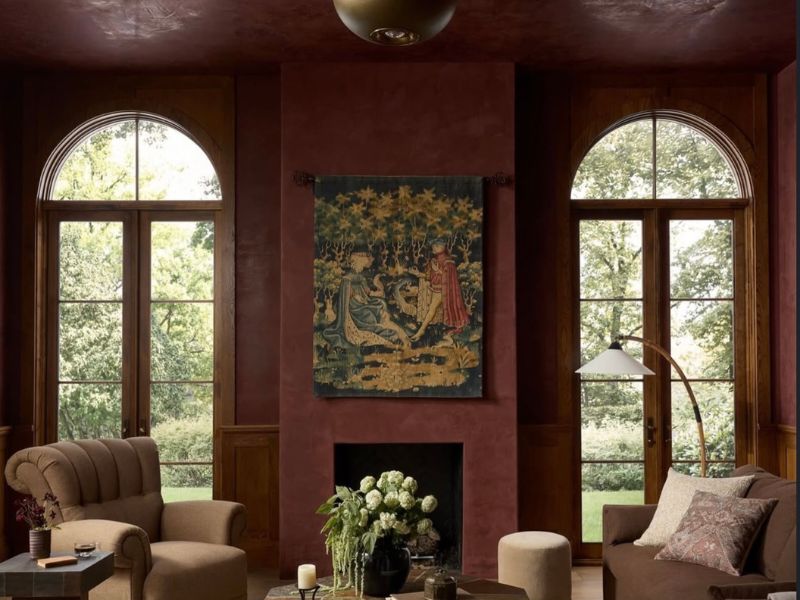
Marmorino Tintoretto is a natural lime plaster made from limestone and marble dust. It creates a smooth matte-to-low-sheen finish with softer movement and more subtle color variation than polished Venetian plaster.
Tintoretto is applied in two coats and can be lightly burnished to add more depth and contrast. To keep a matte look use Stain Shield sealer to protect your finish. Use HydroWax for a subtle, modern sheen. While this versatile marmorino is a favorite for interior spaces, it is also suitable exterior surfaces. See Technical Data Sheet for details.
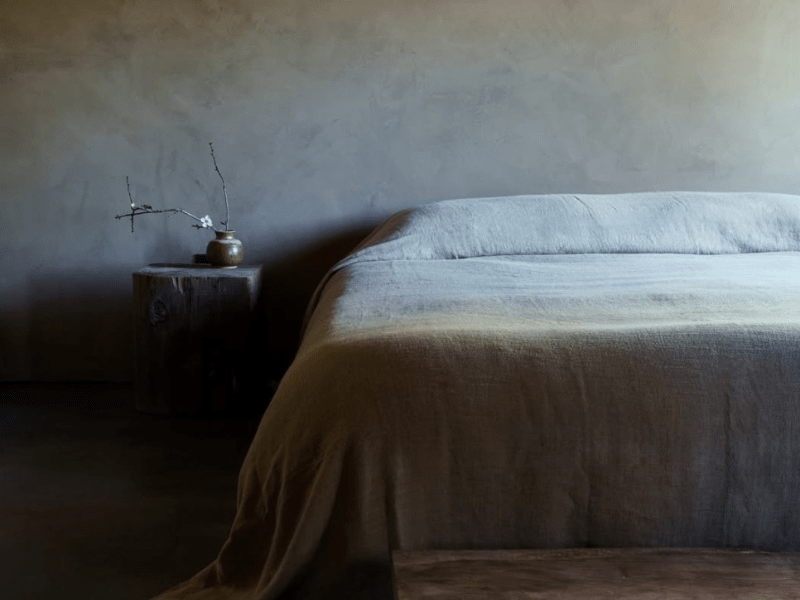
Marmorino Palladino contains medium-size mineral aggregates that give the plaster more body. It can be applied smooth or textured to create travertine, raked, distressed and natural stone effects.
Palladino is an excellent choice when you want a more dimensional Marmorino finish rather than a highly polished Venetian plaster surface. It is suitable for interior and exterior applications. Palladino is ideal for creating polished, Old-World stone-like finishes with a modern twist.

Tonachino Firenze is a natural lime plaster formulated with fine river sand to create a refined, matte mineral finish with soft movement and subtle texture. Depending on the application technique, it can be troweled smooth or worked into a more rustic, sand-textured surface.
Firenze is applied in two coats and is suitable for both interior and exterior surfaces.
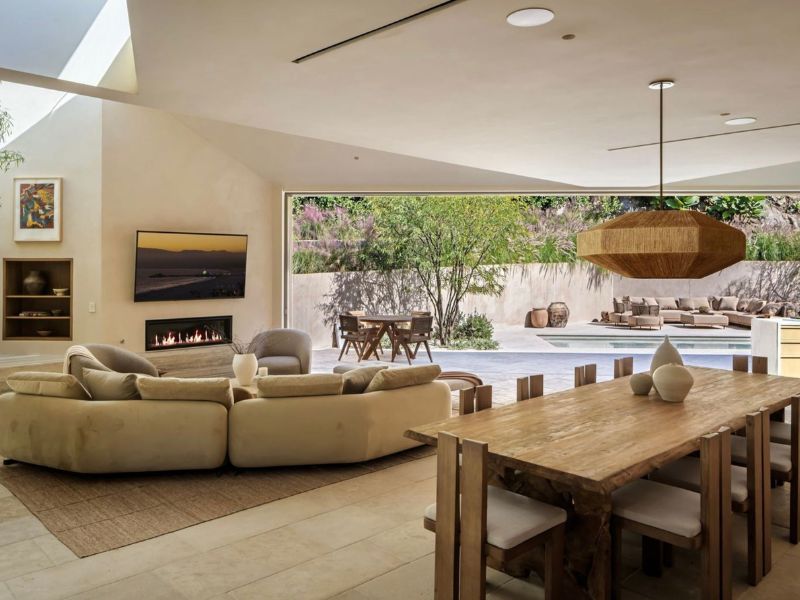
Renaissance Marbleized is an acrylic Venetian plaster formulated for multicolored marble effects. Its extended working time allows several colors to be blended wet-on-wet while creating veining, movement and dimensional layers.
Choose Renaissance Marbleized when the goal is a dramatic, multicolored marble finish rather than the natural single-color variation associated with lime plaster.
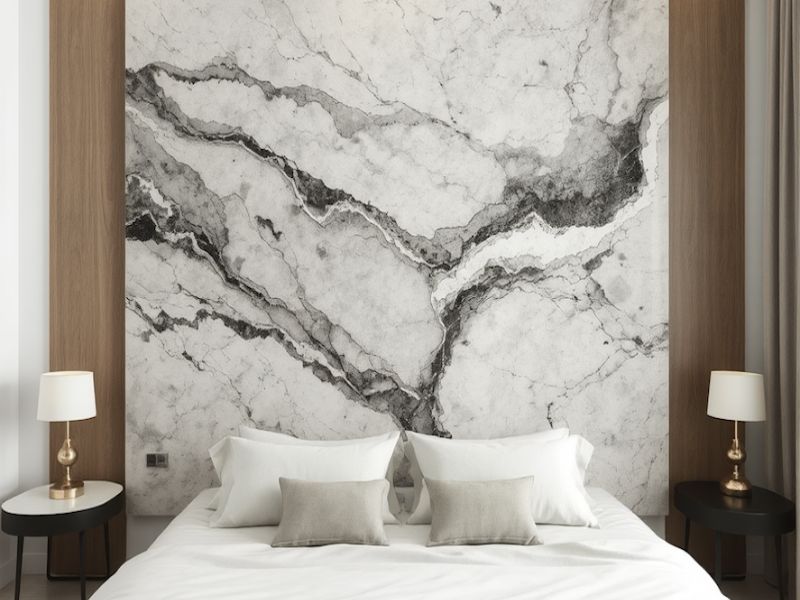
Applying Venetian plaster is different from painting. Trowel angle, pressure, stroke direction and timing all influence the finished appearance.
Practice on a properly primed drywall sample before beginning the wall. Experiment with:
Complete the sample using the same primer, plaster and topcoat planned for the project. Approve the color, movement and sheen only after the sample has fully dried.
Practice boards are especially important for polished Venetian plaster and multicolored acrylic marble finishes. Beginners commonly struggle with uneven coats, scratches, overworking dried material, and heavy application leading to peeling throughout the process.
Surface preparation is one of the most important parts of Venetian plaster application. Plaster should not be used to conceal poor drywall finishing, cracks, holes, ridges or unstable paint.
The wall must be:
A highly polished finish such as Stucco Lamundo or Renaissance Marbleized is best applied over a Level 5 wall. Marmorino Tintoretto can generally be applied over a properly prepared Level 4–5 surface.

New Drywall
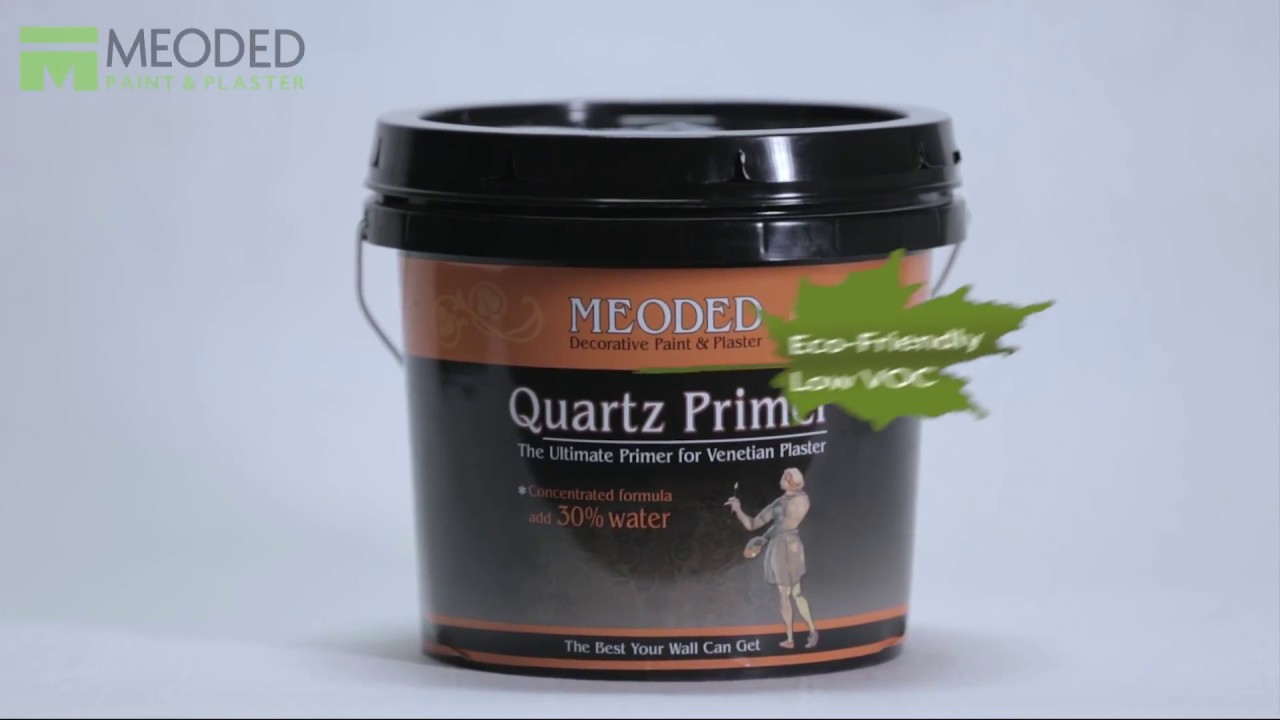
Prime new drywall with an appropriate PVA primer to provide the surface with an even absorption level. Once dry, apply one complete coat of Meoded Quartz Primer and allow it to dry for approximately three to five hours.
Previously Painted Flat Walls
Clean the surface and repair any imperfections. A stable flat-painted wall can generally be coated directly with Meoded Quartz Primer.
Glossy or Smooth Painted Surfaces
Lightly sand the surface to remove the sheen. Clean away all dust, apply a compatible water-based multipurpose bonding primer and allow it to dry. Follow with one coat of Meoded Quartz Primer.
Quartz Primer contains a fine grit that gives the Venetian plaster the proper surface for adhesion and trowel application.
Use a clean, rounded-edge stainless steel trowel or plaster spatula. For light-colored Venetian plaster, use a Meoded WhiteOut Trowel to help prevent dark carbon marks. Clean the blade frequently, as dried plaster can scratch the surface.
Stucco Lamundo and Renaissance Marbleized: Apply the first coat slightly thicker, using overlapping strokes to completely cover the primer. Lightly smooth the plaster to remove trowel lines and create an even base. After drying, lightly sand any remaining ridges or lines and thoroughly remove the dust before applying the next coat.
Marmorino Tintoretto, Marmorino Palladino and Tonachino Firenze: Apply the first coat as thinly as possible while completely covering the surface. After approximately 10–20 minutes, use a damp sponge in circular motions to blend chatter marks and create a smooth, uniform base coat.
Avoid heavy ridges, raised trowel edges, thick deposits, uncovered areas and dried plaster mixing into fresh material. Allow the base coat to dry according to the product instructions.
The remaining application depends on the selected Meoded plaster. Watch the linked video tutorials, below.
Apply the second coat tightly using short, overlapping patches. Allow it to dry for at least five hours.
Apply the third coat in the same overlapping pattern. Keep the coat extremely thin and begin compressing and burnishing the plaster while it is still moist.
The layers should create depth and movement without creating physical texture.
Apply the second coat in the same manner as the first, but slightly thicker to fully embed the aggregates into the wet plaster. While the surface is still moist, repeatedly smooth it with a clean trowel at a low angle until the desired movement, texture, and finish are achieved.
Tintoretto should remain matte or develop only a minimal low sheen. Avoid excessive burnishing if the goal is a soft Marmorino appearance.
Apply the second coat of Marmorino Palladino slightly thicker to fully embed the aggregates into the wet plaster, then work the material according to the selected stone effect. Smooth it for a refined Marmorino finish or shape it with the trowel to create a variety of dimensional stone textures.
Maintain a consistent technique across the entire wall, as the direction, spacing, and depth of each trowel movement will remain visible in the completed finish.
Apply Tonachino Firenze according to the desired smooth or sand finish. For a smooth finish, apply the second coat slightly thicker to fully embed the aggregates, allow it to settle for approximately 5–15 minutes, then smooth the surface with a plastic or Meoded WhiteOut Trowel held at a low angle.
For a sand finish, apply the second coat evenly and immediately lay a plastic trowel flat against the wet plaster. Move it in circular motions to bring the sand to the surface and create a natural sandstone texture.
Apply a thin, even base coat and allow it to dry for at least eight hours.
During the following layers, additional colors can be introduced wet-on-wet. Blend the colors with overlapping strokes or draw fine veins into the wet material to create a customized marble effect.
Burnish the surface to increase depth and sheen. For additional polish, the finish may be sanded with approximately 1,000–2,000-grit sandpaper before applying the recommended topcoat.
Burnishing compresses the plaster and creates the smooth sheen associated with polished Venetian plaster.
Begin burnishing the final coat while the material is still moist. Work in manageable sections of approximately four to six square feet.
Hold a clean trowel at a low angle and gradually increase pressure as the material begins to set. Continue passing the clean blade over the surface every few minutes until the desired sheen develops.
The more the plaster is compressed, the shinier and more color-varied it will become.
To prevent scratches and dark marks:
Burnishing too early can move or tear the plaster as it’s still too wet. Waiting too long can make the surface difficult to polish.
Allow lime-based Venetian plaster to dry for at least 48 hours before applying wax or sealer. A longer curing period can be beneficial when project conditions allow.
The finished color may continue to develop as the lime plaster dries and carbonates. Do not evaluate the final color while the surface is still wet.
A protective topcoat is recommended for surfaces exposed to moisture, dirt, frequent touching or regular cleaning.
HydroWax is a water soluble wax used on smooth lime and acrylic Venetian plaster. It increases sheen and depth while helping protect the finish from moisture and dirt.
Apply HydroWax in a thin, even coat with a sponge, trowel or clean rag. Buff it immediately using a clean cloth, trowel or mechanical buffer.
HydroWax should only be applied over smooth surfaces. Applying it over a heavy texture can produce a white or hazy appearance.
Choose Stain Shield when protection is needed without adding sheen. As a natural look sealer, it is designed to preserve the finish without changing its color, texture, or existing sheen.
Always create a sealed sample before applying a topcoat to the entire wall. Review the completed sample to confirm that the protected finish has the desired color, depth, texture, and sheen before proceeding.
Applying the Plaster Too Thick
Venetian plaster develops depth through several thin layers. Thick coats can create ridges, extended drying times and possible peeling when burnishing.
Applying Over an Uneven Wall
Polished plaster can make drywall imperfections, primer drips, and poor repairs more noticeable while preventing the plaster from achieving a smooth, consistent, and properly polished finish. Correct the wall before applying Quartz Primer.
Using a Dirty or Damaged Trowel
Dried plaster, sharp corners and damaged trowel edges can leave scratches or dark marks in the final coat.
Not Using a WhiteOut Trowel on Light Colors
Standard stainless steel trowels can leave dark carbon marks on light-colored Venetian plaster, especially during smoothing and burnishing. Use a Meoded WhiteOut Trowel to help prevent discoloration and maintain a clean, consistent finish.
Overworking Partially Dried Plaster
Repeatedly troweling an area that has begun to set can pull material from the surface, create rough patches or scratches. Apply the material cleanly, allow it to tighten and return only when it is ready for compression.
Inconsistent Trowel Movement
Changing trowel direction, pressure or stroke size can create abrupt transitions. Use a consistent application style and complete each wall from corner to corner.
Skipping the Practice Board
A sample helps determine the correct color, technique, texture and sheen before the plaster is applied to a full wall.
Venetian plaster can be applied to walls, ceilings, columns, niches, fireplaces and other architectural features in residential and commercial interiors.
Popular applications include:
Stucco Lamundo and Renaissance Marbleized are intended solely for interior applications. Marmorino Tintoretto, Marmorino Palladino, and Tonachino Firenze can be used on properly prepared interior and exterior surfaces.
Application Tools
Materials
Q: Can a Beginner Apply Venetian Plaster?
A: A beginner can learn to apply Venetian plaster, but practice is essential. Start with small sample boards before attempting a complete wall. Matte Marmorino finishes are generally more forgiving than highly polished Venetian plaster or multicolored marbleized effects.
Q: Can Venetian Plaster Be Applied Over Painted Drywall?
A: Yes, provided the paint is stable and the wall is properly prepared. Flat-painted walls can primed with Meoded Quartz Primer. Glossy or slick surfaces should first be sanded, cleaned and coated with a compatible multipurpose primer, followed by Quartz Primer.
Q: What Primer Should I Use for Venetian Plaster?
A: Use Meoded Quartz Primer, a mineral primer with a textured grit designed to grip and support the weight of Venetian plaster. New drywall should first receive a PVA primer. Wood, glossy paint and other slick surfaces may require a compatible multipurpose bonding primer before Quartz Primer.
Q: How Many Coats of Venetian Plaster Are Needed?
A: Stucco Lamundo polished Venetian plaster requires three thin coats. Marmorino Tintoretto matte venetian plaster requires two coats. Marmorino Palladino and Renaissance Marbleized applications can vary depending on the selected texture, color layering and desired effect.
Q: When Should Venetian Plaster Be Burnished?
A: Burnish the finishing coat while the plaster is still moist and beginning to tighten, typically within 5–10 minutes, depending on application thickness and humidity. The plaster should be firm enough to withstand pressure but not completely dry. Work in small sections and gradually increase compression until the desired sheen develops.
Q: Does Venetian Plaster Need to Be Sealed?
A: Sealing is recommended when the surface needs additional protection from moisture, dirt or regular cleaning. Use HydroWax when added sheen is desired or Stain Shield when maintaining a more natural appearance is preferred. Always allow the plaster to fully cure before a topcoat is applied.